何为Elasticsearch
Elasticsearch是分布式搜索和分析引擎 .
Elasticsearch为所有类型的数据提供实时搜索和分析。无论您是结构化文本还是非结构化文本,数字数据或地理空间数据,Elasticsearch都能以支持快速搜索的方式有效地对其进行存储和索引。您不仅可以进行简单的数据检索,还可以汇总信息来发现数据中的趋势和模式。随着数据和查询量的增长,Elasticsearch的分布式特性使您的部署可以随之无缝地增长
本篇写Elasticsearch的目的
利用Elasticsearch实现多维度、高效率、海量数据的搜索查询。
听起来是不是高大上?

小编就吹吹,但是利用Elasticsearch确实可以实现,小编这里主要讲一下它的基本实现和基本功能。深入的功能还得各位在实践中探索。
需要的工具及软件
Jdk8或Jdk8以上、Elasticsearch7.5、Kibana7.5、logstash7.5、Mysql.
其中ELK必须统一、jdk必须8或8以上、数据库可自行选择,小编这里选择的是Mysql.
注:elk基本搭建,本篇不做讲解请自行查看官网文档:https://www.elastic.co/
开始
步骤1
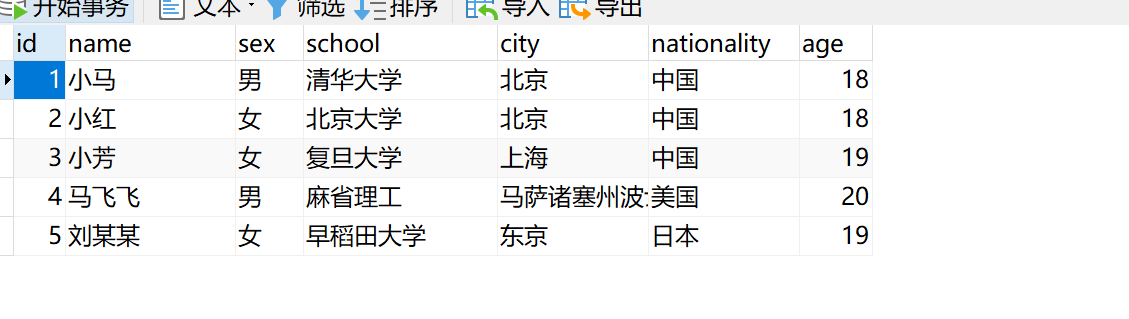
在数据库随便建立一些数据如下:
步骤2
编辑logstash中的管道配置文件,使其从数据库中指定的表读取数据,配置如下:
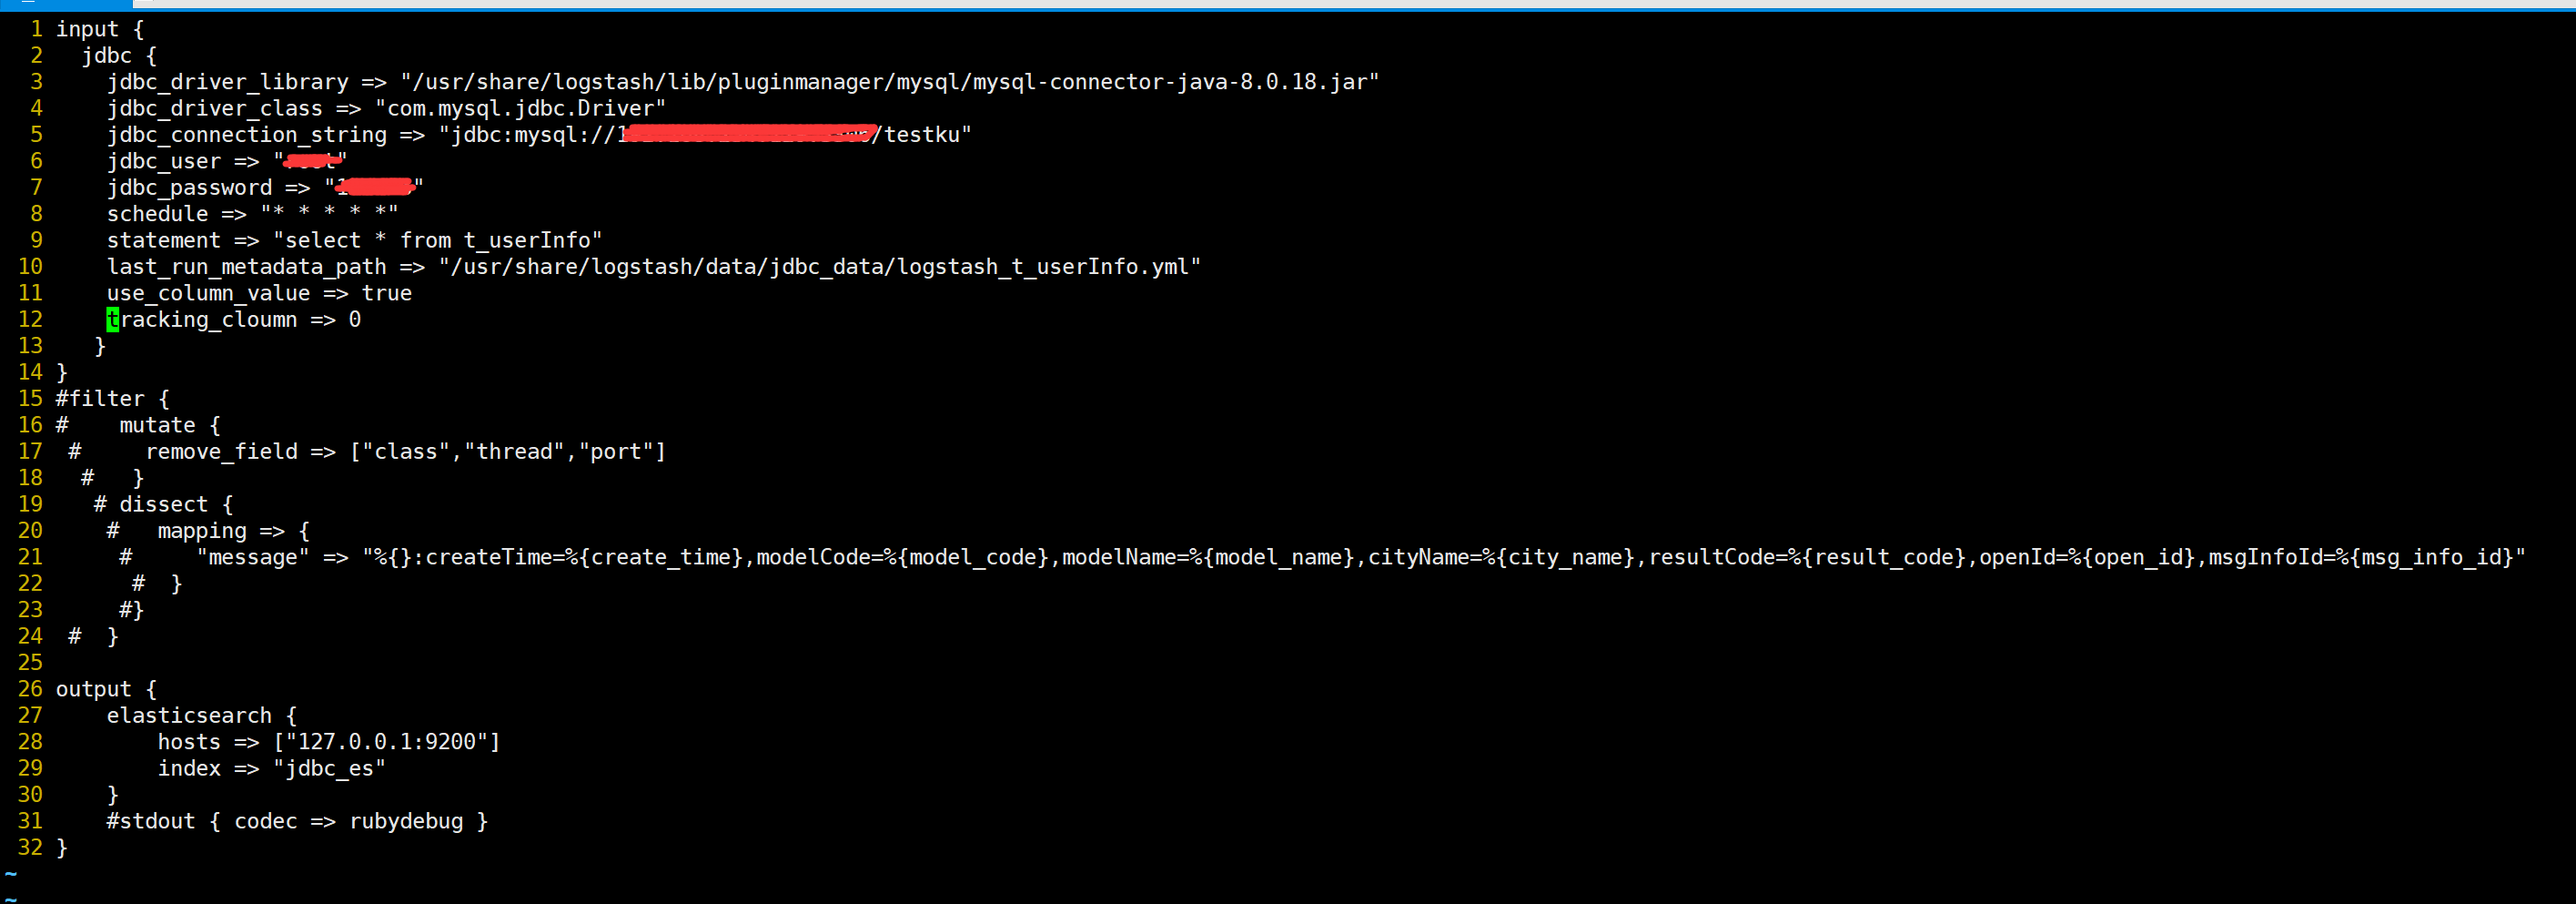
配置参数详解:
jdbc_driver_library:表示mysql的jar,这个文件需要自己自行下载且版本要和自己的数据库版本一致,否则会报错。
jdbc_driver_class:这个是连接配置类,这里是mysql的案列。
jdbc_connection_string:这个是数据库链接地址:jdbc:mysql://localhost:3306/数据库名。
jdbc_user:数据库链接账号。
jdbc_password:数据库链接密码。
schedule:定时任务执行时间,即间隔多久时间执行statement的语句去刷新数据。
statement:需要查询的表。
last_run_metadata_path:查询出来的数据保存的文件。
use_column_value:当设置为true时,使用定义的tracking_column值作为:sql_last_值。当设置为false时,:sql_last_值反映上次执行查询的时间 ,
tracking_cloumn:如果use_column_value设置为true,则要跟踪其值的列 –
配置完后启动logstash.
步骤3
打开Kibana,就可以看到如下数据面板:
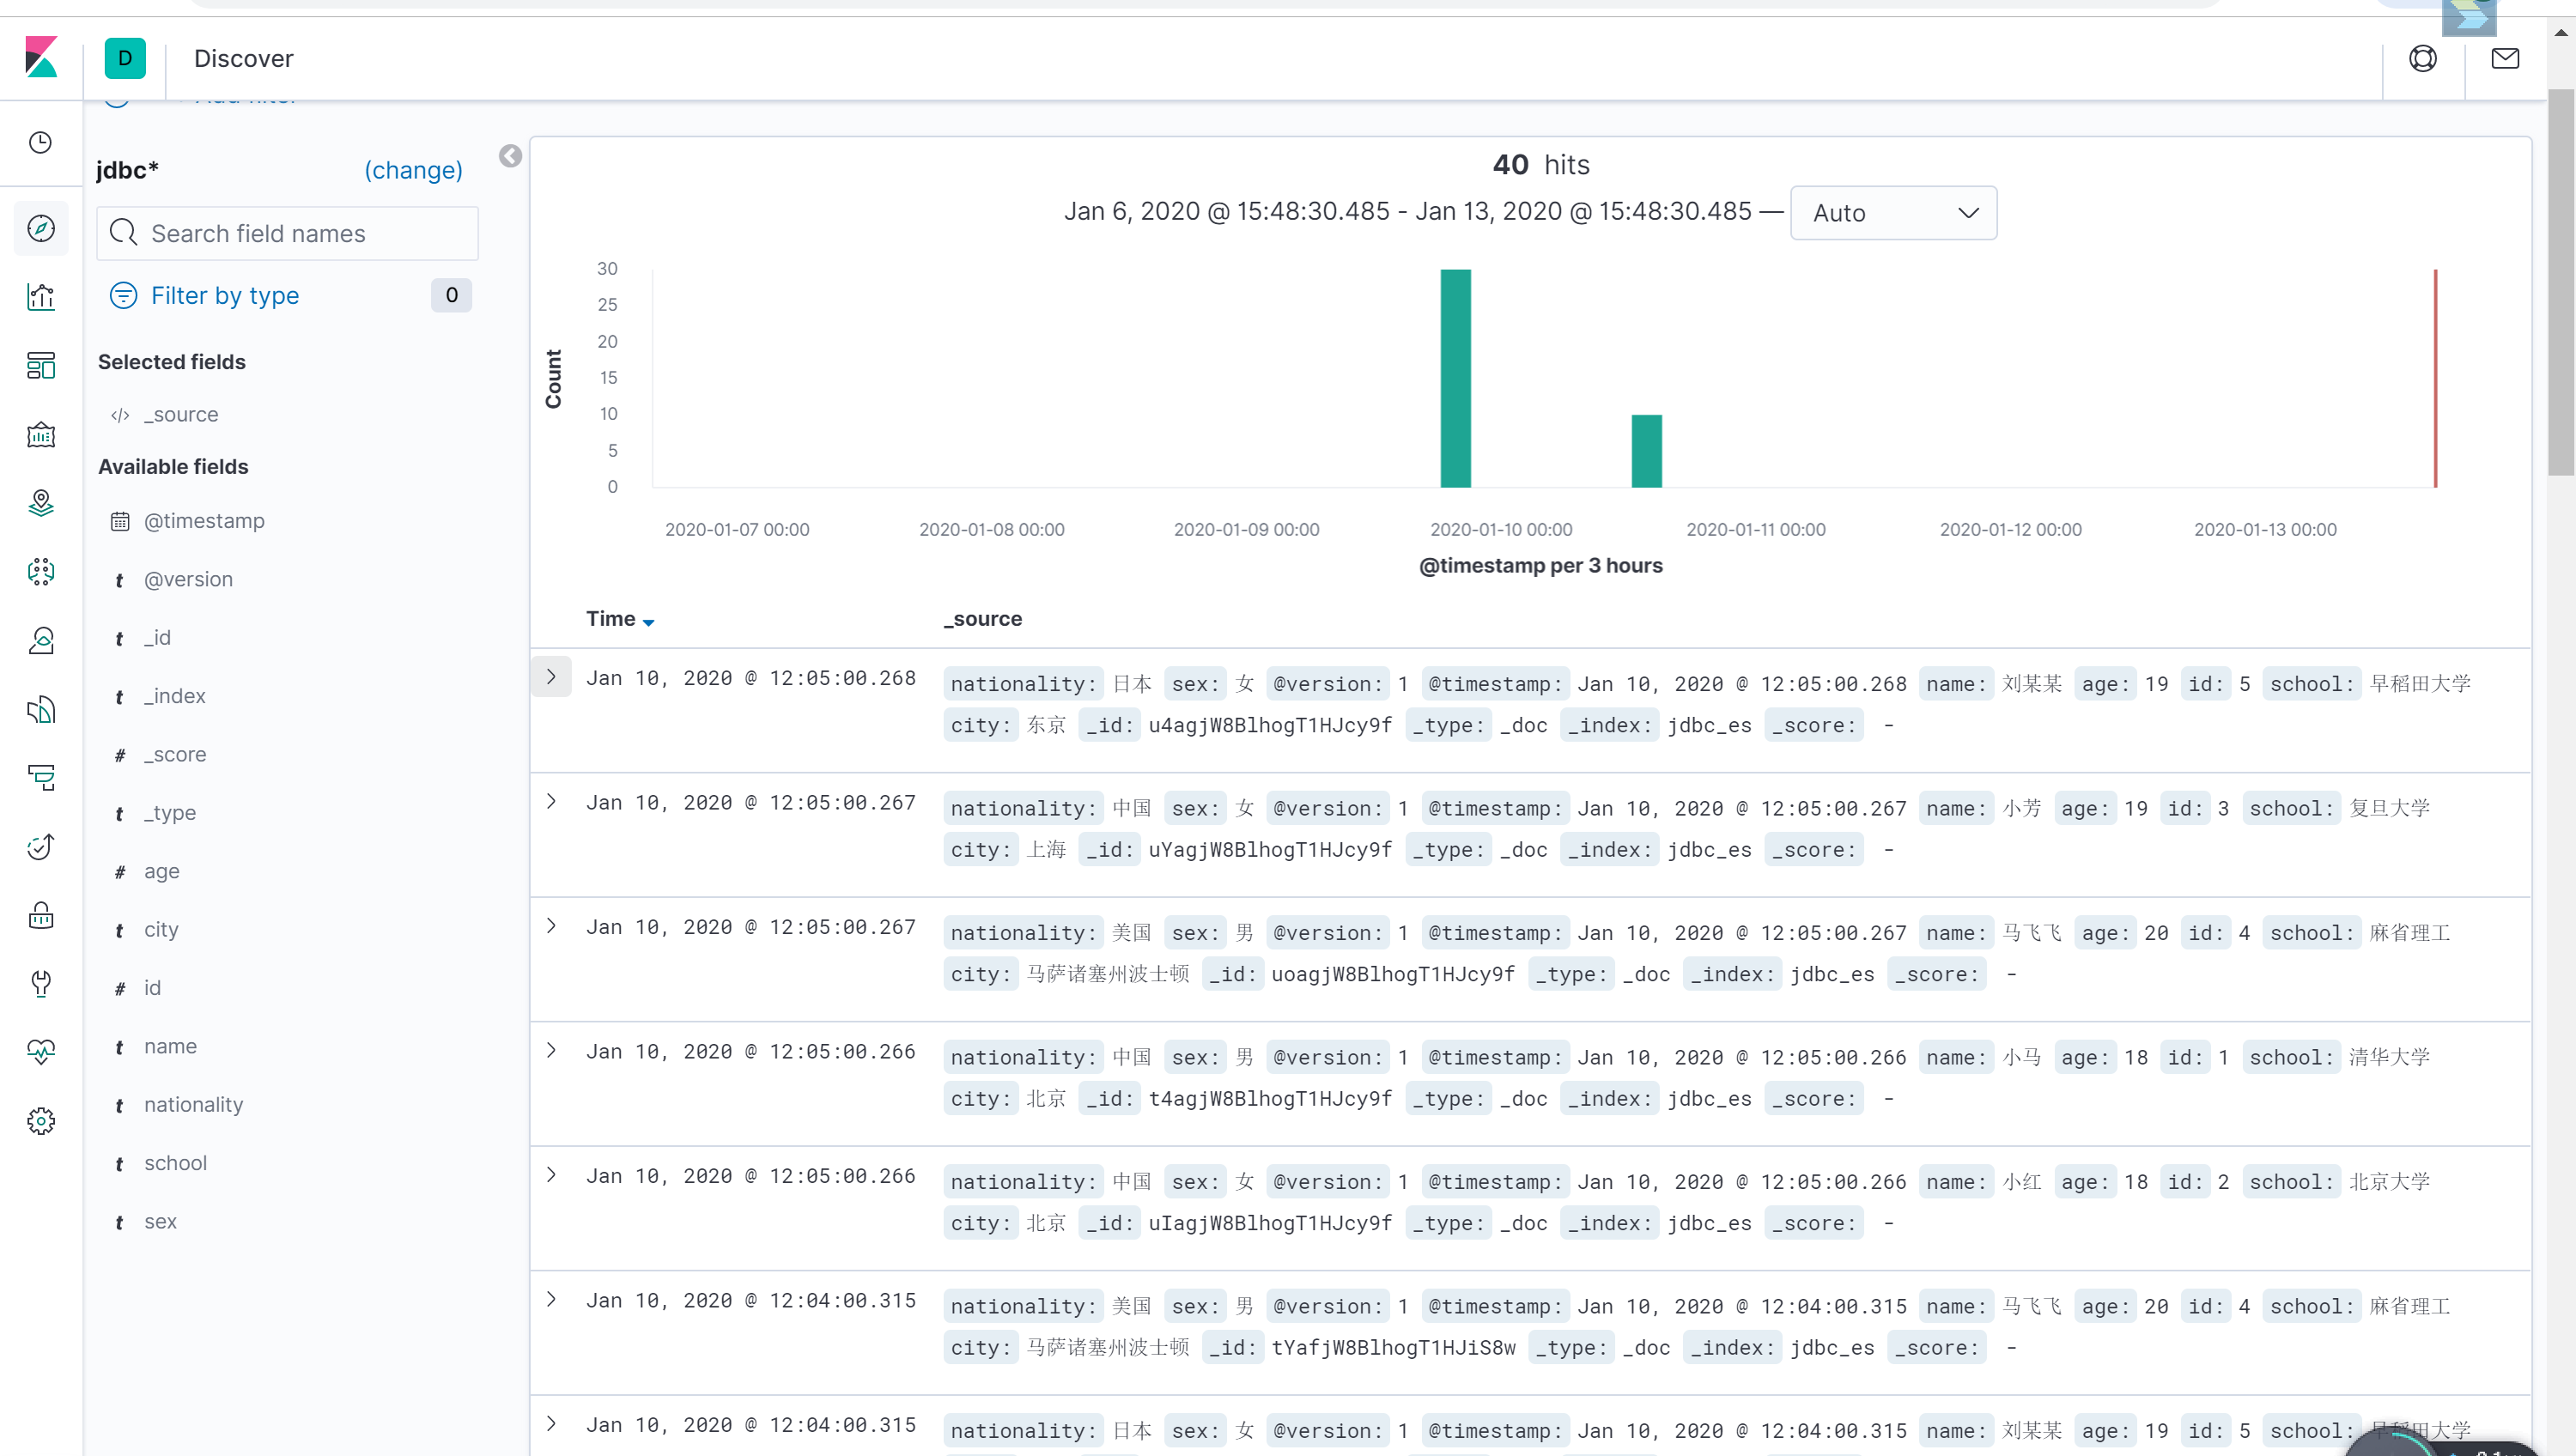
这时表明数据已经读取成功了。
步骤4:简单的获取功能
在Java语言中用Elasticsearch实现数据的获取.
第一步:
导入相关依赖,此处以maven为例:
1 |
|
第二步,编写代码:
1 |
|
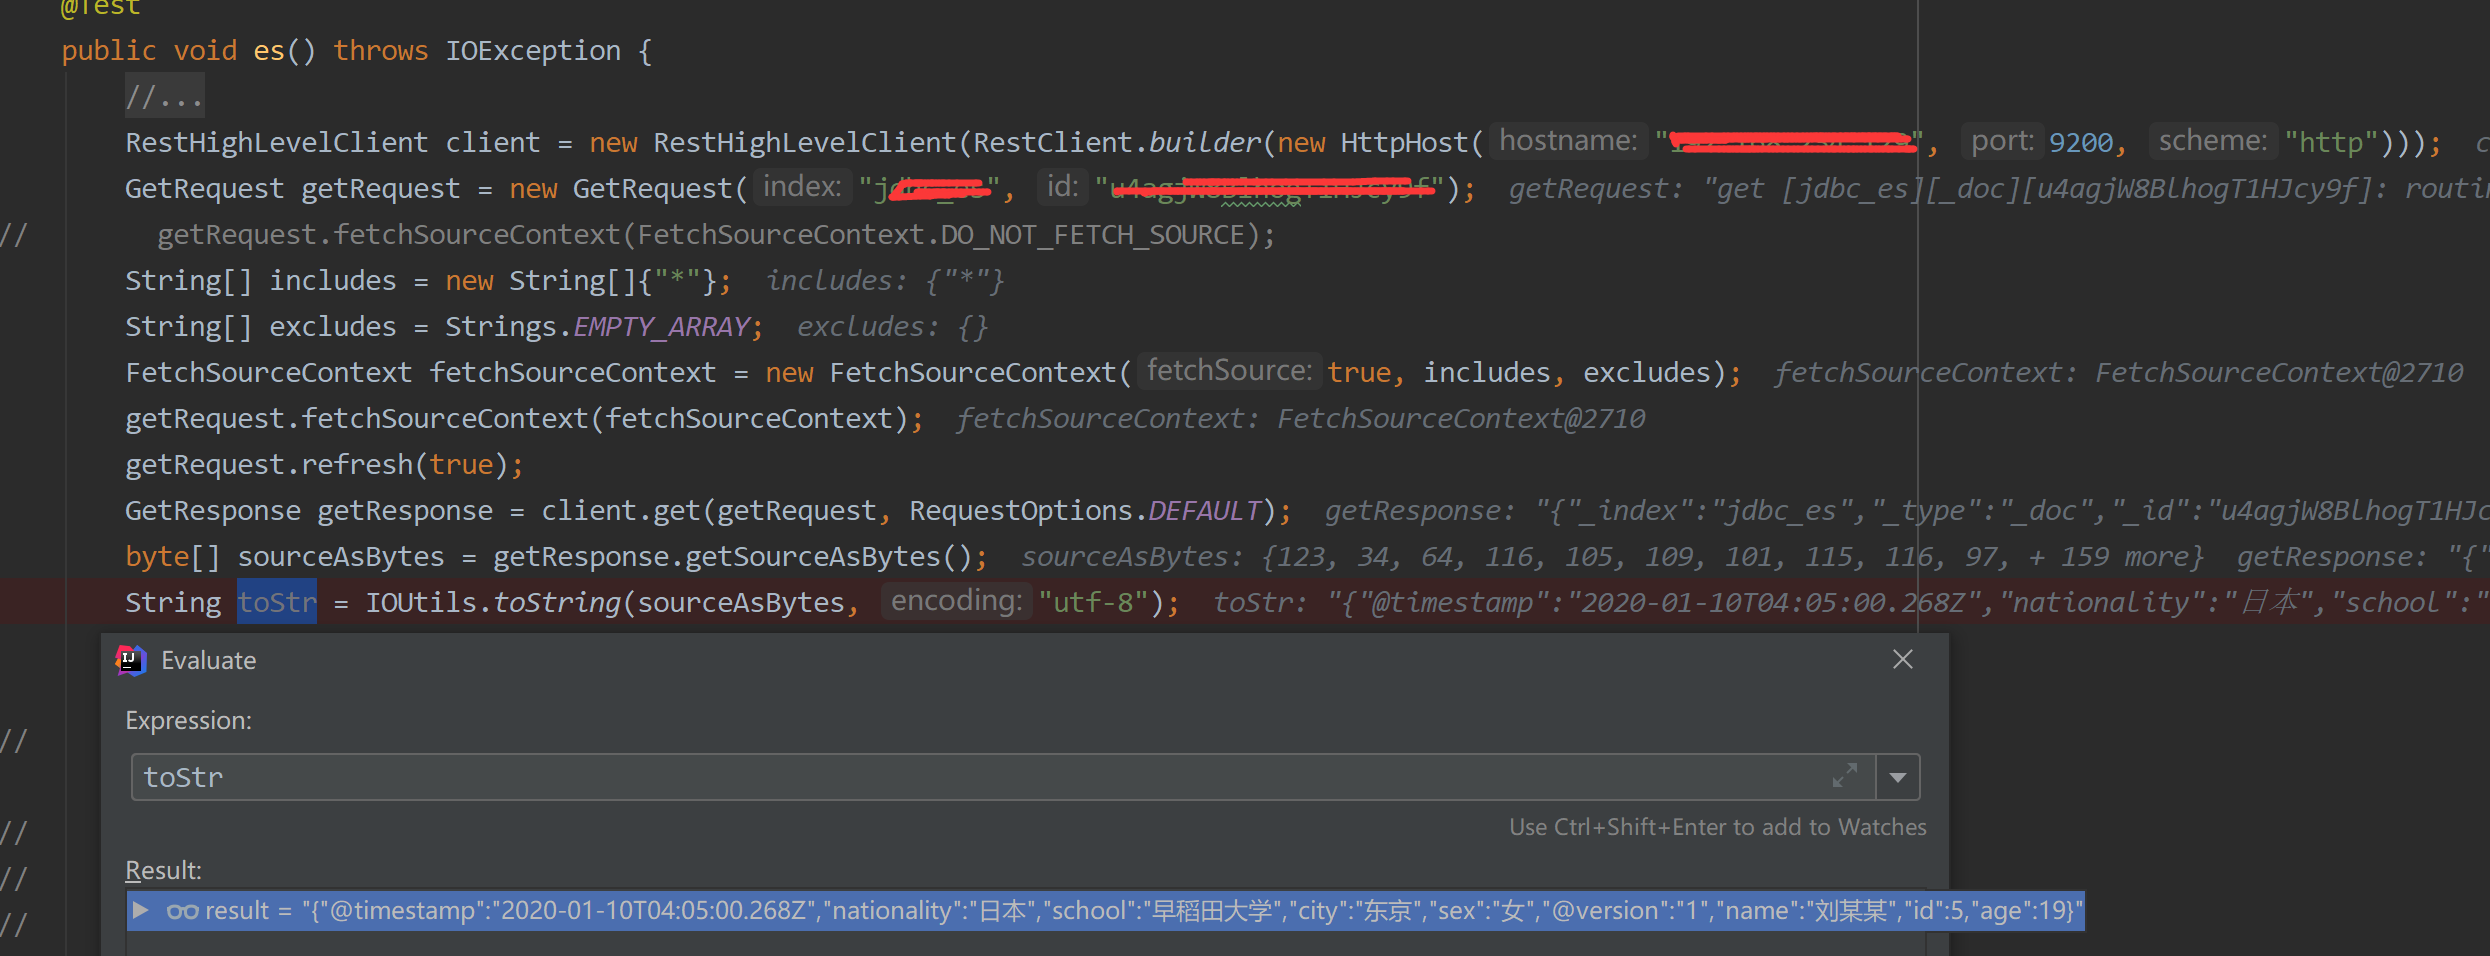
此时就已经完成了一个简单的获取功能。
步骤五:简单搜索功能实现
1 |
|
结果如下:
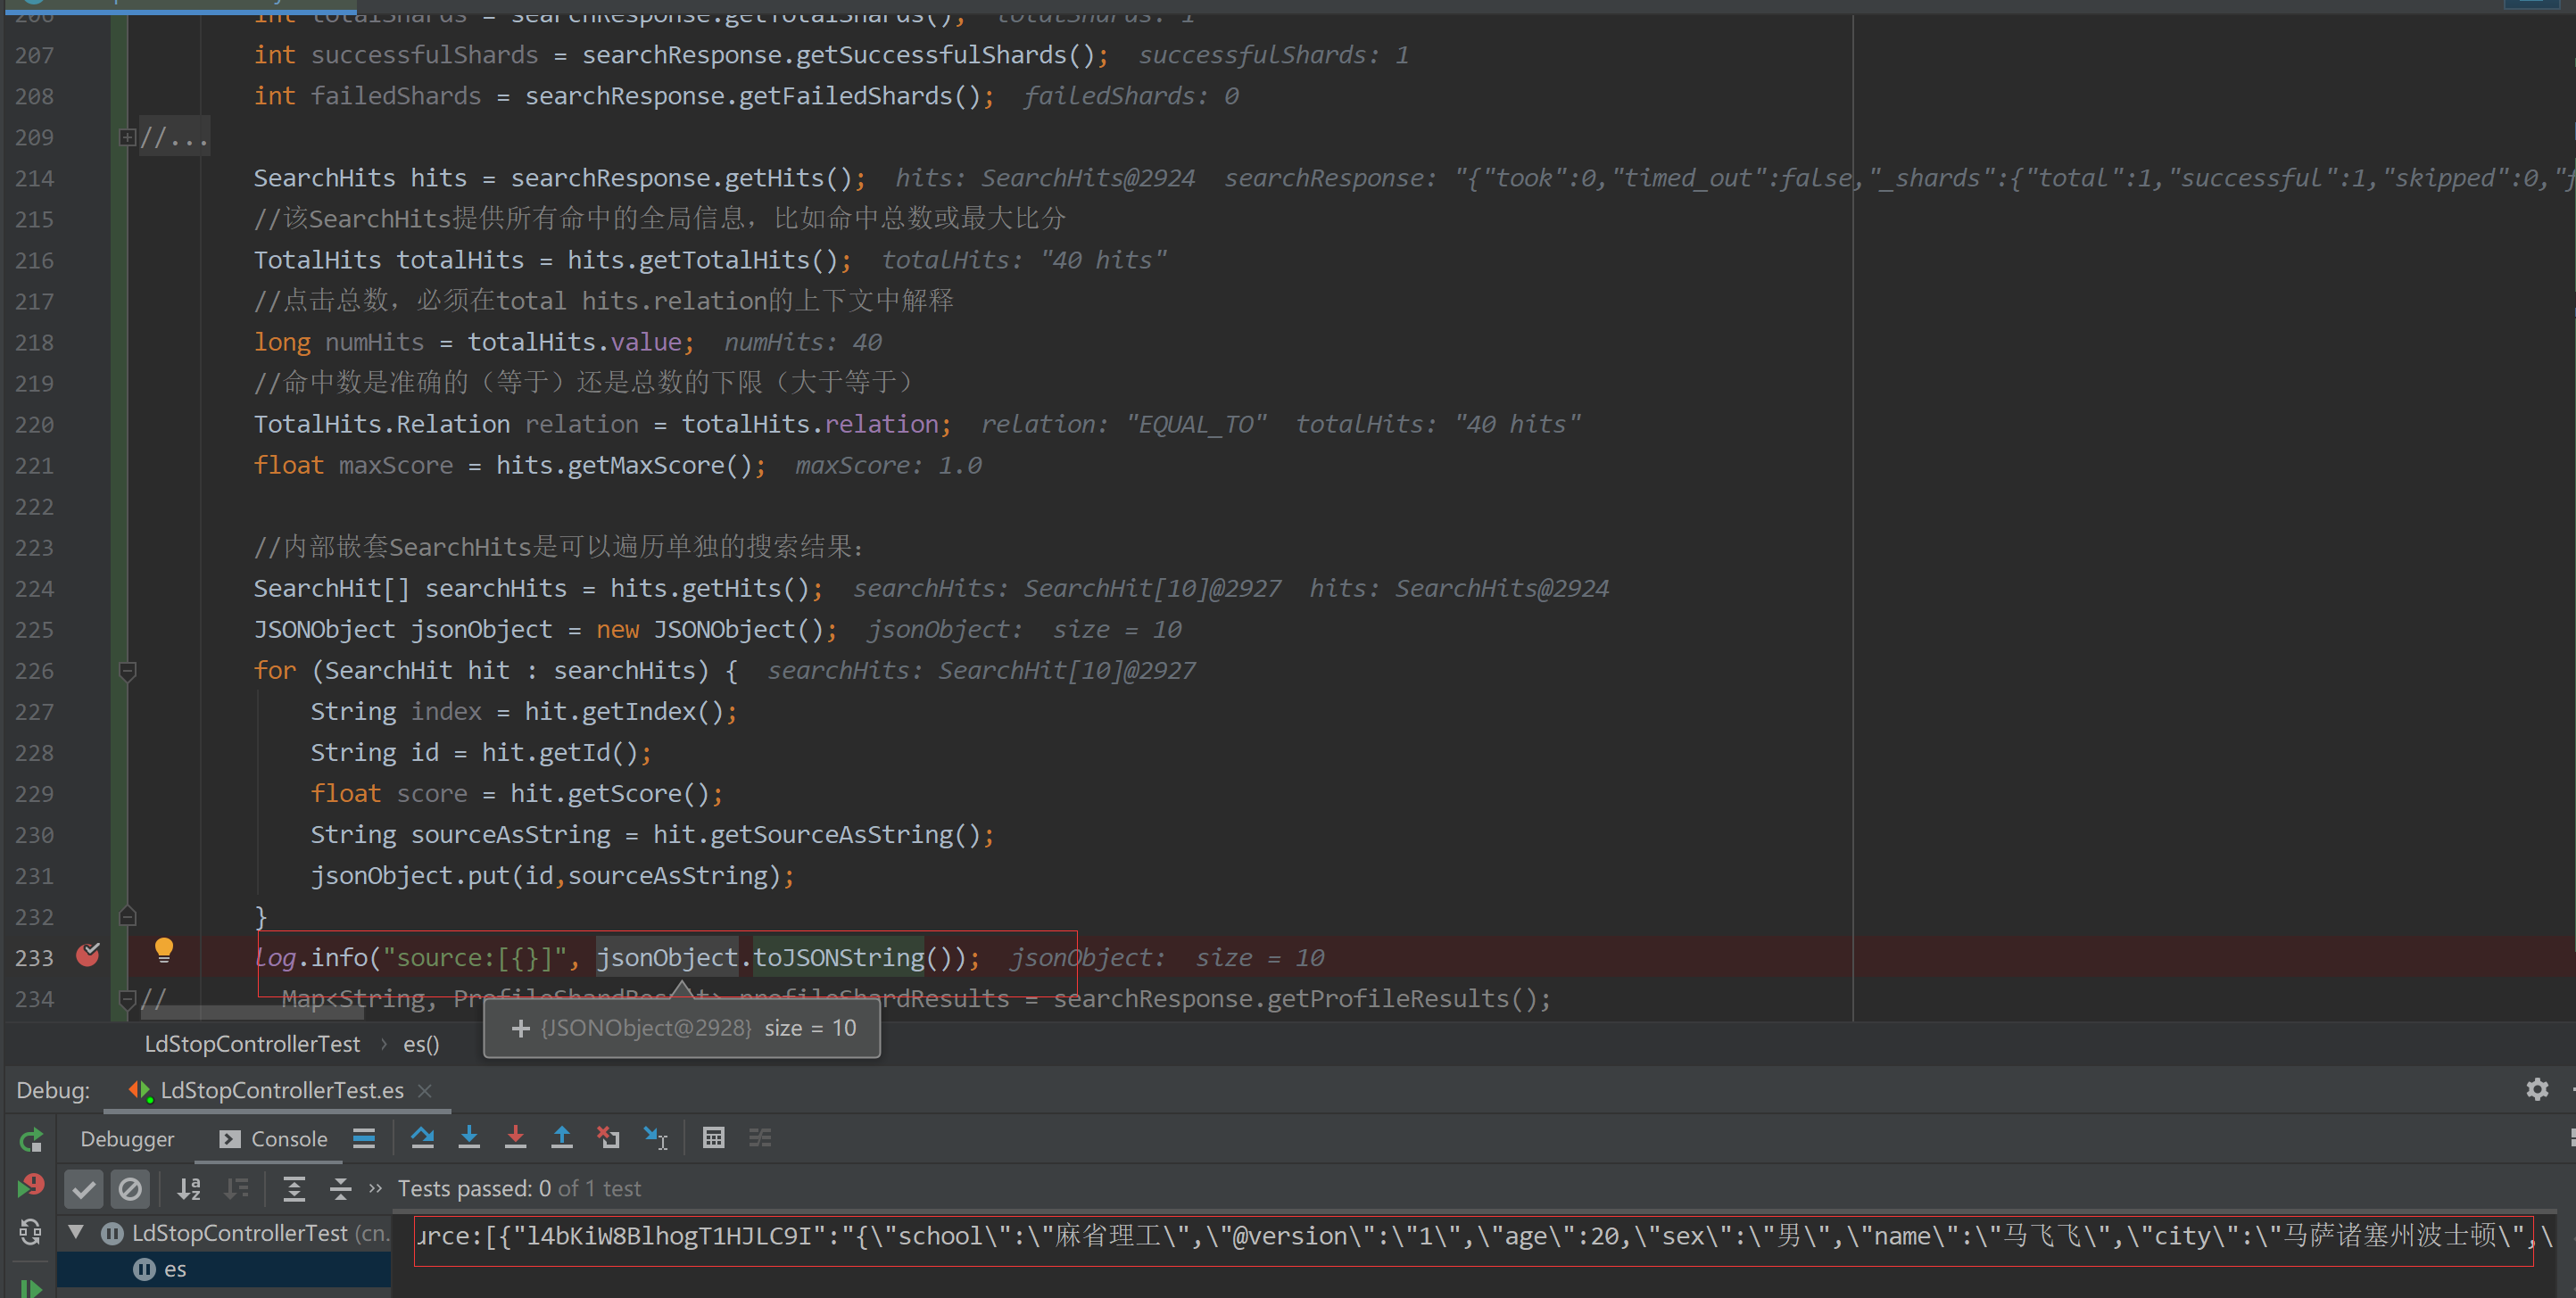
至此,简单的搜索功能已经完成。更多详情功能请参考官网:https://www.elastic.co/guide/en/elasticsearch/client/java-rest/current/java-rest-high-search.html